Saturday 31 March 2012

DERVIN. Dark Room/ Film photography.

The first time we(Me, Liz, Katie and Lily) used a film camera and then went on to develop them, we didn't use a light meter outside for our shots so most of the images where either over exposed or underexposed, there was some worth developing though but when we was going to put them in developer, stop and fix someone came into the darkroom and flashed their phones light, exposing the paper to light and rendering it useless. After having no luck with the negs we wanted to at least have something to show, successfully so we did a photo-gram each; this was mine...

I learned that we should use a light meter at all times if the film camera doesn't have an exposure bar on it. Light/phones in the darkroom can mess up lots of time and effort even if it was accidental- there's no getting it back. On the plus side, I learned how to do a photo-gram. I also learned how to develop film into negatives.

The second time we(Me, Liz,Sam and Ceri) went out with a film camera and went onto develop them, we had a film camera which had a exposure bar to show us if it was too bright or dark so all the images we took were useable and the developing of the negatives was successful as well;

We then went on to develop a contact sheet from the negatives;

then we started to develop single images in pairs, we did two each before running out of time.
Before we developed the single images we needed to do a test to check how much light we needed to expose the paper to to get the best quality image.

our test sheet images;

our developed images;

everything we did in the lesson;

Learned: how to test exposure times for developing, how to develop contact sheets, how to develop single negatives.
The third time(Me, Liz and Sam and Ceri) we used a film camera we used studio lighting, with the camera hooked up to the flash which we had a lot of trouble with, the camera we had wouldn't connect to flash properly so we couldn't take any photos.

The forth time we(Me and Liz) used a film camera and went onto develop them we used studio lighting again with a different camera hooked up to the flash, we were taking head shots of actors with a black background and one light lighting, low key. We took a first shot with two lights and sitting the subject in a different direction to what we ended up changing it to- we changed the set up to one light and the opposite direction then took one more photo of a different actor- when it came to the third actors photo the film camera and the flash had stop working together and we used four shots trying to get it connected again but had no luck, after figuring out that it was infact the way we was holding the film camera to our faces that was the connection out, so we switched hands and after that there was no problems. We photographed 8 actors in total after them everyone had gone so we used the rest of the film up by photographing each other in the same lighting. The next week, we developed them successfully produced a contact sheet each;


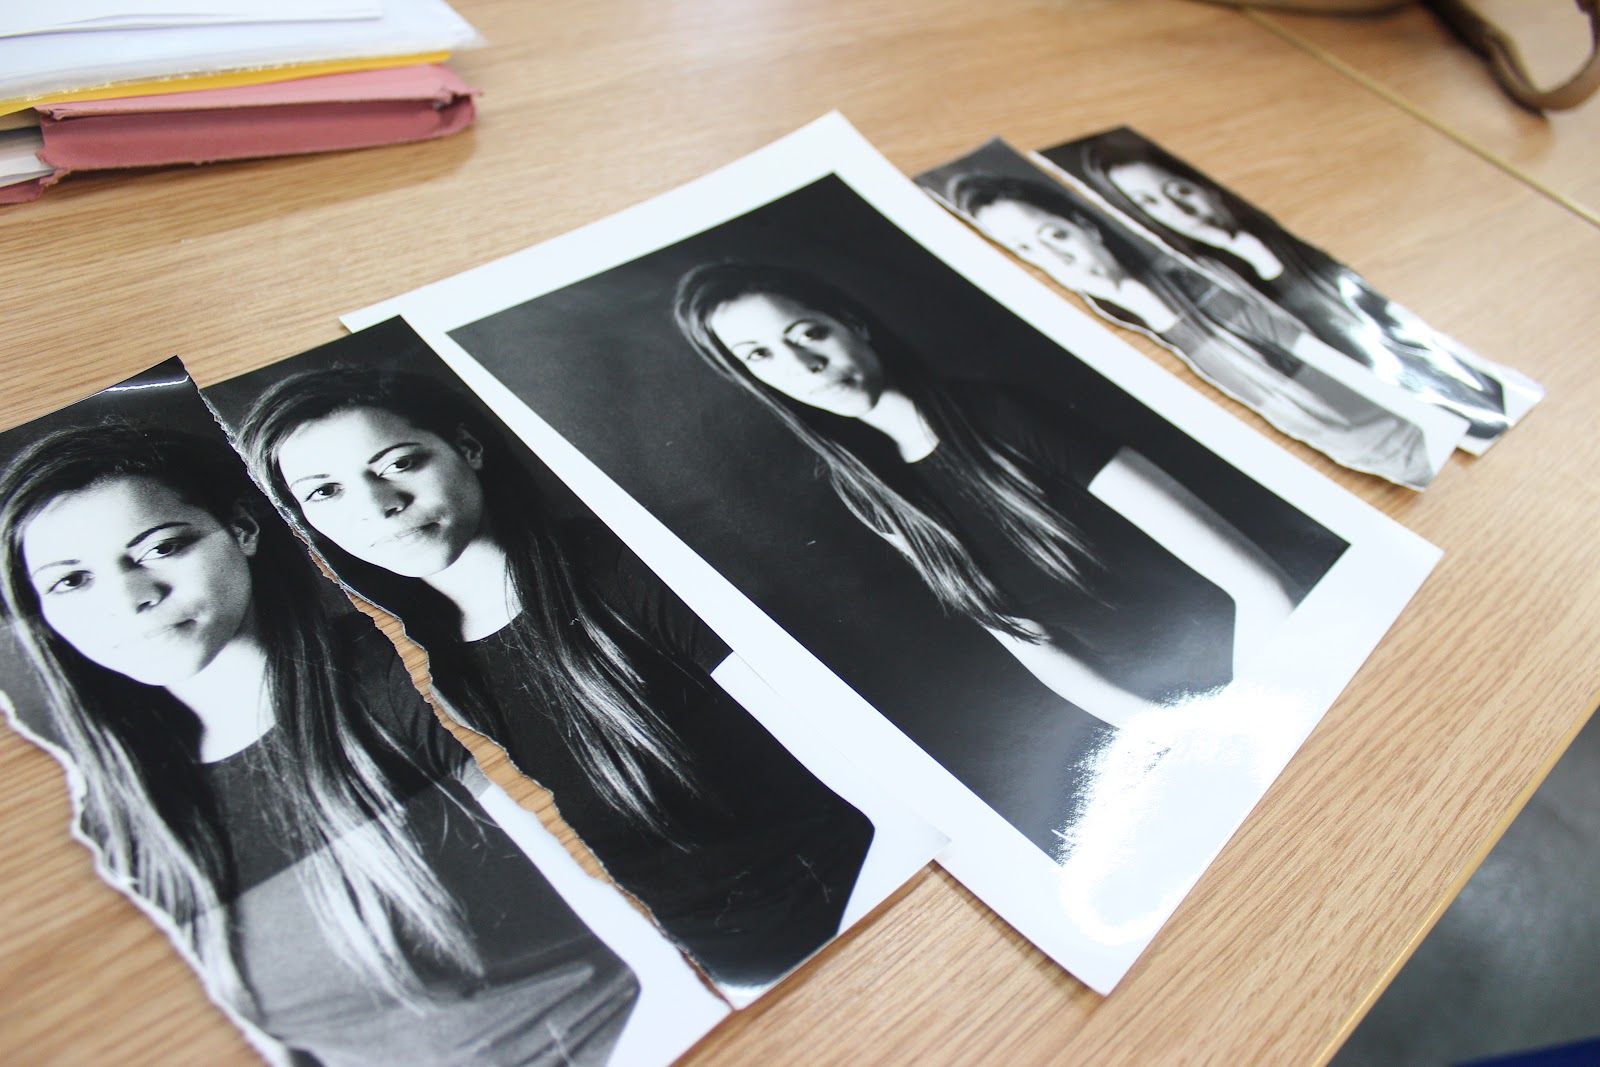
and developed one single image each too, first doing a test strip and we choose to develop it with a border;


unfortunately both our prints of this image had a scratch on it by the end of the process.

The fifth time time we were in the darkroom we continued our head-shot prints. We started off doing test strips of one of the negatives but the first time we did a test we hadn't changed the expose so it turned almost completely black, the second time we it still didn't give us any clue as to how long we should expose the paper for and the image it's self didn't focus again after the first test so we changed the neg we were using in hopes we'd do a better job;


we did so many test strips of this neg too, eventually finding the right exposure of light we needed, we used the easel again to create a boarder around the image:
I learned that when you do dark room that its defiantly not going to always come out the way you want it to, it's so easy to mess up and you can't edit them mistakes, Not being defeated by it going wrong and persevering pays off in the end, no many how many times it will never come out perfect.

The sixth time of being in the dark room we continued developing our head shots. We did the usual numerous test strips before finally deciding which exposure time would be best before then developing the image properly.


Thursday 29 March 2012

TOM. processing Landscape and Architecture.

Important factors within landscape and architecture photography:
  1. Quality of the image. Always shoot the images in RAW.
  2. The focus needs to be sharp and clear. If not there is no way to adjust this in the editing process, making the image taken useless.
  3. There needs to be as little noise as possible in the image. Having the ISO at it's lowest should ensure that you image quality is at it's best, and noise should be kept at bay.
  4. The Image has to be clear. There should be no camera shake, blur or motion blur.
  5. The image needs to be correctly exposed. This can be checked by using the histograms.
  6. The image needs to have an interesting composition. The composition of an image can be changed before the picture is taken, changed for another picture but after the shoot has finished, there is only two things you can do to change the composition when editing the images; by cropping and "getting rid" of for example some food wrapper that's on the floor of your landscape image.
  7. Colours and contrast. Colour and contrast can be changed in the editing process of the images, so this factor can be changed as many times as the photographer would like, to create different moods,feels and effects to the image, although considering colours in camera makes a massive different to the images result.

Monday 26 March 2012

STEVE. Experimental photography; Scannography.

Scannography is basically a type of photography where they use scanners to make/create images. By using a scanner as a camera it creates really unique effects and thus two images could never be the same because of this. Sometimes it almost looks like the contents of the image are underwater. The colours the scanner creates can change because if the subject moves alot it creates a rainbow "smudge" from where it's been and also to get the best image you have to be touching the scanner or very close to it. When using objects to create an image I love the way it turns out because it looks almost 3D and real. On the other hand I love how ridiculous is makes people look, you can even give yourself cat eyes (see the image below) you can stretch out your face, hands, feet etc- What I find most impressive though is the detail it can capture but it also has the option to distort the image if the subject is moving and it creates this beautiful, out of this world kind of feel.


^turning to scanner on it's side like a camera creates this sort of image.

TIM. Daylight, location photography. Reflectors.

(Grey Cards, spot metering(exposing))
use a grey card to find out the proper white balance, get the model to hold it and take the first photo with the grey card in the picture- then when in photoshop you can use curves to find the correct white balance.

I saw little difference with using a reflector on this day but I do see a small difference and I believe that with practice with using the reflectors I'll be able to make them more effective- I do think they'd be handy for location shoots to be able to fill in any shadows on the subject face and by using colored card you can tint the subject too.
< without reflector.

(^with reflector. )
(blocking sun.)(not blocking sun.)

(^with reflector)

Friday 23 March 2012

TIM. HDR photography,

-Shoot in RAW. (for better editing options and quality)
- Better to do on days where there's a busy/cloudy sky.
- Edgy and lots of detail.

You make three different edits of the same image- bringing out the detail in each one the same then underexposing one of the three edits and overexposing another on the edits- keeping one of them as the "normal"/correctly exposed image. You then Take the brighter image and the darker image and copy one onto the other then "overlay" the top layer so they blend.


darker image...
blended on top of brighter image...
has this result.
then you blend the correctly exposed image onto this image and...

This is the final Image;


this result image is not exactly HDR photography, but "it's getting there" I think with more practice I'll be able to create a HDR image successfully with this method.

Thursday 22 March 2012

MARIA. Sequencing;

Duane Michals photography;


MY SEQUENCES;


(unfortunately no matter how many times I tired to upload this image it wouldn't so here is a screen shot.)