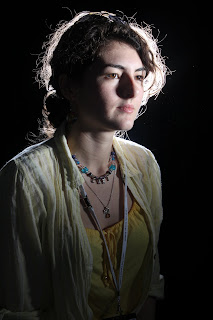
We learnt four different forms of low key lighting set ups and took shots of a model in these set ups. Me and Liz then stayed back and did extra work doing more shots in these set ups so we could improve our skill and gain more experience of studio work.
For these shoot we had the ISO set to 200, we took a light measurement with a light meter and it read F11 and the shutter speed set at 125.
The forth lighting set up we learnt was using a reflector and two lights, on to the left of the subject and one directly behind the subject head in order to get the haloed effect but with reflected light from the right hand side of the subject which we produced by using a sheet of sliver mirrored card in order to get a harder reflection, if we wanted to get a softer reflection we could have used a white material as the reflector. (see image below for my example of this set up.)

The second set up we learnt was with two lights, one to the left of the subject and one directly behind the subjects head, facing forward towards the photographer in order to gain a “halo” effect . (See image below for my example of this set up.)


No comments:
Post a Comment